
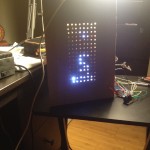
Pumpktris Complete!
My Halloween project for 2013 is Pumpktris! Like Nathan Pryor of hahabird.com said “What do you get when you combine a pumpkin with the classic video game Tetris? Pumpktris! Fully playable, embedded in a pumpkin, and with the stem serving as a controller.” Here’s my attempt at creating Nathan’s award winning Pumpktris.
The foam pumpkin doesn’t carve like a real pumpkin so it doesn’t quite “glow” like his. On the positive side it will be around for a few Halloween’s to come and who knows what features I can add in the future! I won’t take credit for any of the creative side of coming up with such a unique project but I will take credit for the 18+ hours of actually building it! I’m hoping my girlfriend can help me spruce up the outside before Halloween or else it will have to wait for next year to get a face lift.
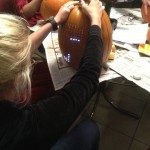
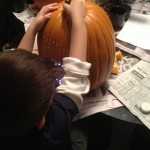
Last night I had the first chance to turn it on and my girlfriend’s nephew Ian couldn’t wait to be the first to play! Check it out.

Ian rocking Pumpktris!
Why I Did This
Like I mentioned on my previous post Halloween Project Coming Soon! I really just wanted to have some fun building something that most people (especially my friends and family) haven’t seen. I bumped into Pumpktris last Halloween on Instructables.com and immediatley had the desire to build my own! A year later I still had the desire so I decided to start working on it and have some fun.

Tired Hands!
Unfortunately after my 4th hour of soldering, I definitely started wondering WHY I thought this would be fun! Now I’m super happy I pushed through and completed it on time (my self-imposed deadline 10/26) to bring it to our annual pumpkin carving gathering. I’ve learned that if I don’t set deadlines for myself I can be a professional procrastinator.
After Ian started playing, it was tough to get him to share! He’s a great kid and eventually he let everyone have a turn…sorta of! I knew the project itself would be a ton of fun but I never really thought about how much people would really enjoy playing games on a pumpkin. This really inspires me to do more fun project like this every now and then so I can write about them here for everyone to enjoy.
The Guts of It
Here’s a slideshow of the entire process if you want to save yourself the grueling details:
-

- Fake-Pumpkin Farm
-
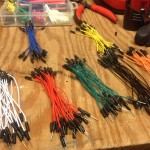
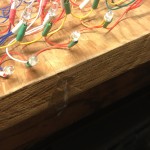
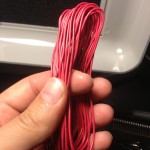
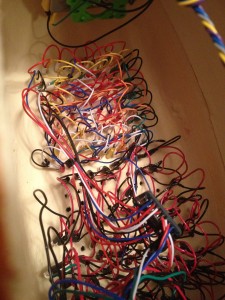
- Wires
-
- Daisy-Chain
-
- Cutting the back
-

- One side down
-
- Open back
-
- iPhone LED inside for fun

-
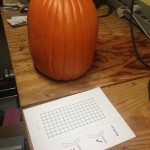
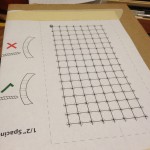
- Template ready
-
- Starting hole
-
- Used my volt meter
-
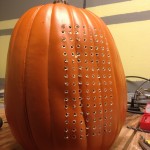
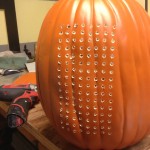
- Holes drilled
-
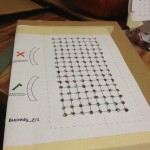
- Jig template
-
- Drilling jig template
-
- First two rows
-
- First matrix wired to LED backpack
-
- First test (mirrored image)
-
- LED’s
-
- Top Matrix
-

- LED Matrix was Mirrored
-

- Tetromino
-
- Wires for the 2nd matrix
-
- Setup
-
- How I cut them all at once


-
- Almost done with 2nd matrix
-
- Second matrix complete!

-
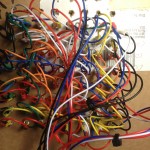
- All the daisy chains close up
-
- LED backpack
-
- Stem cut off and hole drilled

-
- Used an exacto knife
-
- Mounted joystick with 6 bolts inside
-

- Had to widen the whole
-

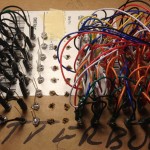
- Electronics
-
- Operational matrix outside of the pumpkin
-
- This is how I took it to the pumpkin carving party
-

- Pumpktris Guts!
-
- Megan playing
-

- Ian playing again
-
- He played for a while!

-

- Ian playing

-

- Time to look at everyone’s creations!
-

- Great turnout!


-

- It’s an owl not a cat!
-

- Candle light looks better than LED’s
-

- Pumpktris & Friends
-

- Too many to fit on one chair
-

- Pumpkin photoshoot
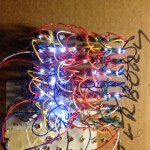
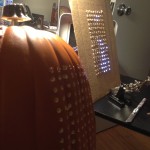
THE LED MATRIX
Here’s a quick list of what the LED screen is made of:
- 2 matrices – 64 LED’s each
- Total of 128 LED’s (8×16)
- 2 pins each so over 300 soldered connections
- Most important – 4 sleepless nights of soldering!
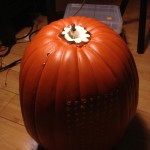
Pumpktris Guts!
Playing the game is easy and comes with 4 controls to move the tetrominos.
- UP – rotate
- DOWN – speed up drop
- LEFT – move left
- RIGHT – move right
After I powered it up and Ian was done playing my girlfriend was next and then the rest of clan.
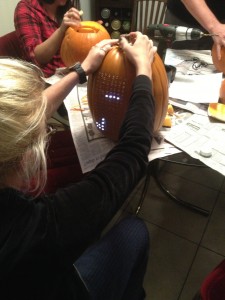
Megan playing
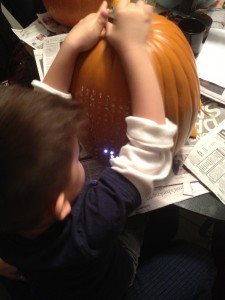
Ian playing again
What it Took
I originally wanted to build Pumpktris last year when I saw Nathan Pryor’s Instructable page for the Halloween contest that was happening at the time. It was only a few days before Halloween so I didn’t have time to complete it. I ended up drilling random holes into my pumpkin and let them blink randomly! Not exciting…
So this year I made up my mind and made sure my girlfriend was ok with me spending more time with a fake pumpkin than with her. Luckily she wanted to see this thing built too! So with approvals in order, I announced that I would be working on it on my last post Halloween Project Coming Soon! last week on Oct 19th. By then I ordered some of the materials but all of them didn’t show up until the 22nd.
Time was NOT on my side but I finished it just in time for our annual pumpkin carving get together. Both of my girlfriends brothers/sisters are super talented so here are some pictures of their work.
-
- Pumpktris & Friends
-
- Pumpkin photoshoot
-
- It’s an owl not a cat!
-
- Candle light looks better than LED’s
-
- Great turnout!
-
- Time to look at everyone’s creations!
-
- Too many to fit on one chair
If you’re interested in some more of the technical details read on where I walk through the process of building Pumpktris.
PLUS: Don’t forget to sign up and follow my blog to keep track of my latest project!
[contact-form][contact-field label=’Name’ type=’name’ required=’1’/][contact-field label=’Email’ type=’email’ required=’1’/][contact-field label=’Comment’ type=’textarea’ required=’1’/][/contact-form]
Choosing the Pumpkin

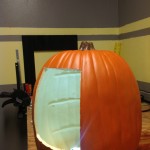
Fake-Pumpkin Farm
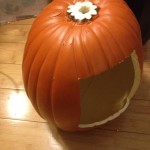
Originally I was going to use a real pumpkin until I found a huge cage full of artificial pumpkins at Michaels. They had several different models and I noticed they had one that was tall enough to hold the matrix so I begged my girlfriend to buy it for me (left my wallet at home). Also, after seeing Nathan’s pumpkin rot after a few days I wanted to build one that could last for years.
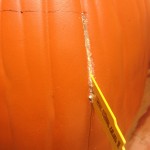
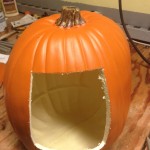
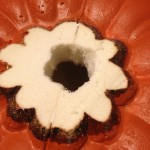
I started by cutting out a large 8×8 opening on the back side of the pumpkin that would let me load up the LED’s and electronics without a problem. Looking back I wish I would have made it 10×10! I broke 3 LED leads setting them into their holes.
Cutting it Up

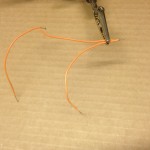
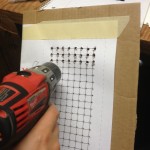
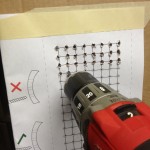
Used my volt meter
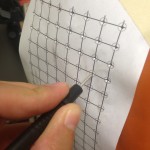
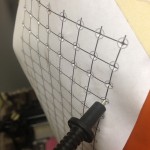
I used a hole template provided by Nathan on his Instructables page (thank you so much again Nathan!). That thing saved me a ton of time and made sure that all the LED’s were lined up and spaced out properly. I started by using the tip of my volt meter to poke the initial hole. The tip on my volt meter has stabbed my hands at least a dozen times so I knew it would work perfectly!
Next I drilled out each hole using the lowest speed possible since the foam pumpkin tended to grab onto the drill bit and wanted to tear out a bigger chunk. I checked the diameter with a LED until I found a bit that created a hole that really grabbed the LED and kept it from falling out.
LED MATRIX HOLDER
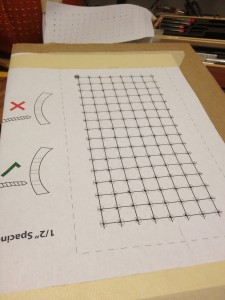
Jig template
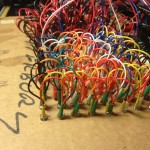
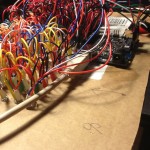
 In order to solder the 256 LED’s into a matrix I had to recreate a jig just like Nathan’s except I used a piece of cardboard from the packaging that the parts came inside. I printed 2 hole templates so I used the second here. I taped it to the front of the cardboard and repeated the process.
LED BACKPACKS
Before I started any work I wanted to make sure I could compile and run Nathan’s Tetris code onto my Arduino. So I followed his instructions and used the LED matrix that came with the Adafruit mini 8×8 matrix to test out the code. Everything worked like he said so I moved on to the real work next…

Adafruit Backpack: Image taken from Instructables.com
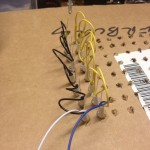
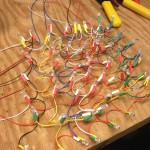
Wire Prepping
 Before I could solder the LED matrix I first needed to cut the wires to length. I used the same lengths as Nathan:
- 214 pcs @ 2.5″
- 32 @ 12″
I cut off about a 1/4″ of insulation from every wire and built 32 daisy chains, each with 8 connections. I tinned the tips ahead of time and threw all the chains into a pile (big mistake!). These chains are like velcro and held on to each other like a barrel of monkeys.
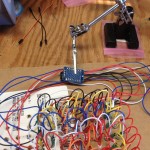
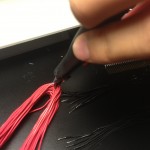
Soldering
My best friend when soldering is FLUX, FLUX, and more FLUX. I picked up a flux pen at Fry’s before I started and it really helps when you’re trying to get the solder to hold onto these tiny wires and leads. I dabbed all the LED leads with some flux and when I went to join them it was a breeze.
Not to say that everything went according to plan. After I finished building the first 8×8 matrix I noticed I wired the columns backwards! Grrr.
It took me a little while to find out what I did wrong but here’s a video of how the demo program looked:
The images appeared mirrored so I had to invert the column order. At this point I think it was around 1am Wednesday and when I finished I still had one column that wasn’t working! Turns out the wire broke off of the anode while I was handling another column. Once I fixed that connection Voilà! I enjoyed the milestone for about 2 minutes then went to bed.

LED Matrix was Mirrored
2nd Matrix
Having worked out all the kinks on the 1st matrix the 2nd matrix took less than 1/3 of the time compared to the first one. I thought it through, setup a little production line, put my headphones on, and played my favorite EDM hits (check out my Spotify playlist – EM Beats. I was done in about 2 hours this time.
Clean Up
Finally I could tie down the wiring and solder connections that I had made with jumpers and tape. Here’s the finished matrix inside the jig:

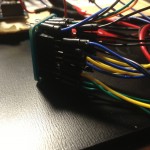
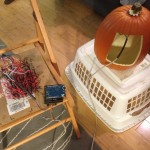
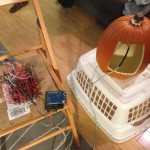
Electronics
Joystick
Originally I wasn’t going to use a joystick but an Android app instead, unfortunately I ran out of time. I’m going to work on it this week and post it as an update hopefully before Halloween. I’ll be using this BT shield for the Arduino and using the Amarino Toolkit on the Android side.
So for now I used Nathan’s method of using the stem as the controller. It works but I’ve noticed some kids get really rough with it so I’m just waiting for them to tear the whole thing out!
Playtime
After hours and hours of building here’s the final product! I agree with my girlfriend that it needs to be spruced up a bit. The problem is that since I’m using a foam pumpkin it doesn’t carve like a normal pumpkin. Instead the orange acrylic paint rips off in large ugly pieces and the foam tends to break. If I can figure out a good way to carve it I’ll upload the pictures.
Comments
Well that’s Pumpktris and it’s been a lot of fun and work getting this thing to come alive. If you want a detailed instruction on how to build your own I think you should use Nathan’s Instructable here. He put a lot of work into that instructable and explains the assembly in a really organized fashion.
I would appreciate any feedback so please leave your thoughts on the comments section below! I’ll post fun videos of people playing with the pumpkin this week and during Halloween.
Thanks for reading,
Tom
PS – Pumpktris can do so much more than play Tetris, if you want to see a specific image or a scrolling phase just leave a comment below and I’ll take a picture or video and upload it for you!
PSS – Don’t forget to sign up and follow my blog to keep track of my latest project!
[contact-form][contact-field label=’Name’ type=’name’ required=’1’/][contact-field label=’Email’ type=’email’ required=’1’/][contact-field label=’Comment’ type=’textarea’ required=’1’/][/contact-form]
